
How to enable and disable automatic non-disclosure agreement (NDA) signatures
Last updated: October 9th, 2023
When requesting access to a listing, you can reassure sellers that you'll protect their startup information by signing a mutual non-disclosure agreement (NDA). It's mandatory if you want to access a startup's full listing information and build trust with the seller.
Enabling auto-signatures also saves you time by submitting a signed NDA automatically when you send an access request.
Watch the following video to learn how to turn on auto-signatures for mutual NDA and follow the steps listed below.
How to enable and disable the auto-sign mutual NDA feature
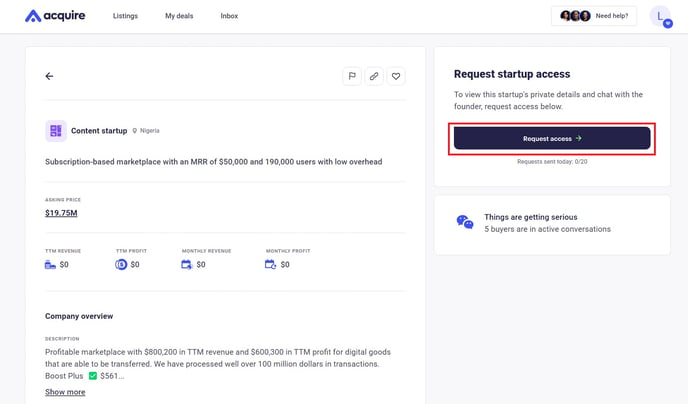
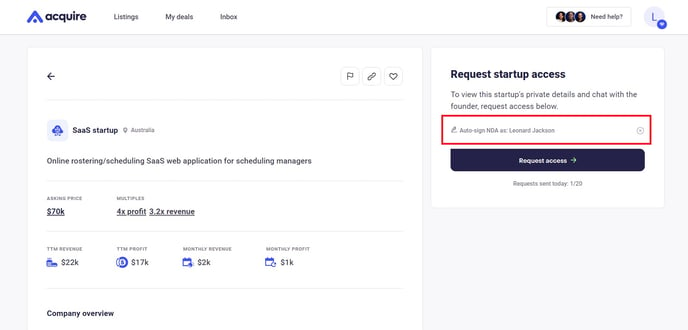
1. When you find a listing that interests you, click Request access.
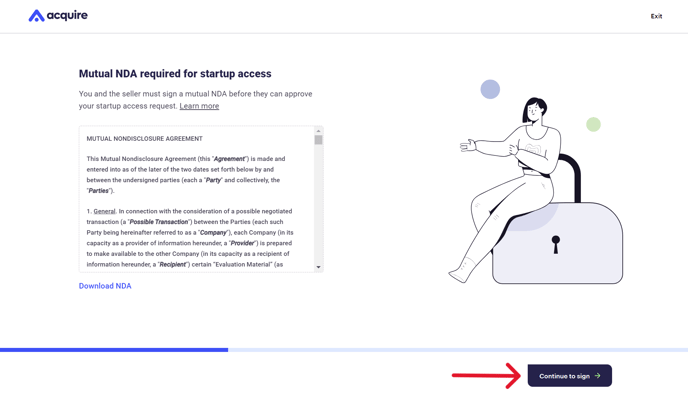
2. Read through the mutual NDA and click Continue to sign.
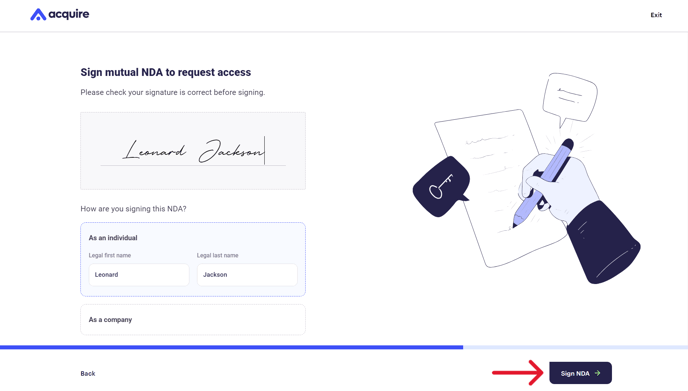
3. Type your name into the signature box and choose to sign as an individual or as an entity. Enter your name or your company's name into the boxes below. Click Sign NDA.
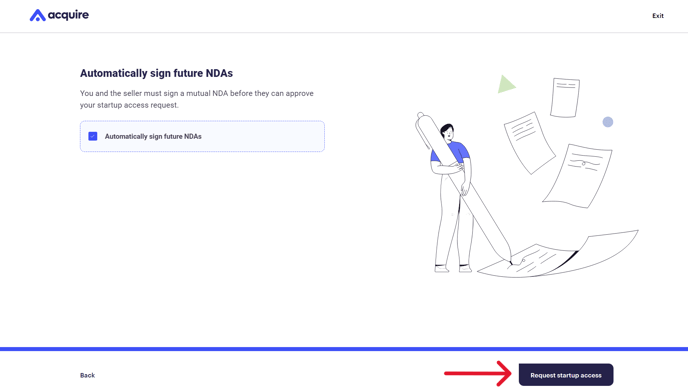
4. Check the Automatically sign future NDAs box to enable auto-signatures. Click Request startup access.
5. You've successfully sent the mutual NDA and access request to the seller. Wait for their response and prepare for your early conversations with the seller.

6. To disable mutual NDA auto-signatures, click the "X" next to Auto-sign NDA as: Your name.
Now, you'll have to manually sign an NDA for each startup you request access to unless you re-check the auto-signature box.
Still need help?
Please search the help desk again or contact support at support@acquire.com.